
COSTUMES
STAR WARS EPISODE II: ATTACK OF THE CLONES
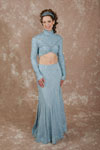
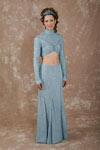
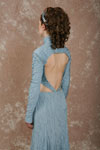
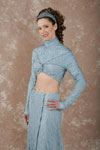
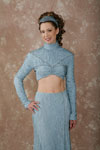
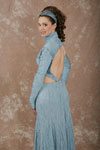
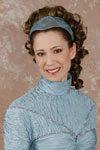
PADME AMIDALA NABERRIE RESIDENCE GOWN
A.K.A. "DELETED SCENE FAMILY
GOWN"
August 2006
 |
 |
 |
 |
 |
 |
 |
 |
Details
 |
 |
 |
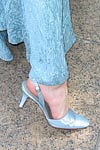 |
FABRIC: Diagonal Doubleweave Habotai, 45". The fabric was hand dyed, then stretched and lightly pressed along the bias to accentuate the diagonal crinkles. The pattern pieces were all cut on the bias. The shirt is flatlined and padstitched onto nylon tricot that was dyed to match the silk.
SKIRT PATTERN: I started by combining Vogue 2882 (for the number of gores in the back) and Simplicity 5914 (for the angle of the flair of the skirt bottom). Gores had to be added to the front of the skirt, and the patterns were modified through trial and error with muslins. Because this is a wrap skirt, the center front gore was cut three times (one to overlaps the other, and the third piece is used as a lining on the outer flap).
SHIRT PATTERN : I started with Butterick 3344 View D as a general base. I redrafted the sleeves and experimented with draping several muslin trials until I came up with my own pattern. 1/2" wide elastic runs along the bottom front edge and sides of the bodice in a casing (thanks for Ferdalump and JainaMSolo for the advise). A sew-in swim bra was added to the inside of the bodice for extra shaping and support.
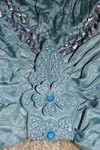
TRIM DETAILS : The costume worn in the movie is decorated with tiny blue trochus shells. I had to make my own trochus shell beads by dying the shells, scrubbing them clean with a toothbrush, drilling tiny holes with a dremmel, and then sealing the hundreds of shells with Krylon UV Resistant gloss spray.
LEAF CLIPS: The leaf clips were sculpted in sculpy clay. The design was based on a studio photo of the real costume, as well as a high res shot of a similar clip used on Episode III on Padme's senate dress. (Thanks to Kristin for that tip!)
After the clay shapes were baked, I made RTV molds of my shapes and cast multiple pieces in resin so they would all be identical. Finally, the pieces were sanded, primed, painted, glued and finished off a coat of rub-n-buff and a few blue crystals.
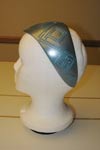
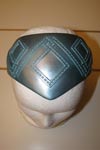
HEADBAND: The headband was made out of sintra and styrene. I first created a wire cage template that was shaped to match my head. I cut out my sintra using a scroll saw. I then used hot water and a heat gun to shape the sintra into a compound curve over my wire mesh template. A lot of CA adhesive, bondo spot glazing, and sanding was required to get the shape perfect and smooth. I then added the raised geometric pattern to the headband by carefully cutting styrene strips and gluing them onto a pre-drawn layout. Finally, the headband was primed, airbrushed with custom mixed-to-match acrylic model paint, sealed with a matte clear coat, and metalized with a bit of pearl blue rub-n-buff. (Thanks to Stormtrooper Princess for sharing her idea of making the headband out sintra).